

Prerequisites
- Node.js 22.16 or later within the 22.x line, or Node.js 24 or later
- npm or npx
- Git
- An installed and running DSH or Codex desktop client
Online installation relies on npm plugin packages or the GitHub plugin marketplace. If your network environment cannot access external registries directly, you can install the CLI globally via
npm install -g @rpamis/comet and initialize your project with comet init.DSH plugin installation
DSH distributes the Comet plugin through an officially supported npm plugin package.Installation steps
- Open the DSH desktop client and select Plugins at the bottom of the left navigation bar.
- Select Add plugin in the upper-right corner of the plugins page.
- Enter
comet-dsh-pluginin the package name field, verify the plugin source, and select Install. - Once installation finishes, switch to the Installed tab and confirm the Comet plugin is enabled.
- Open any project session. A Comet entry appears in the left navigation bar; select it to open the Dashboard. If the entry does not appear immediately, exit and restart DSH.
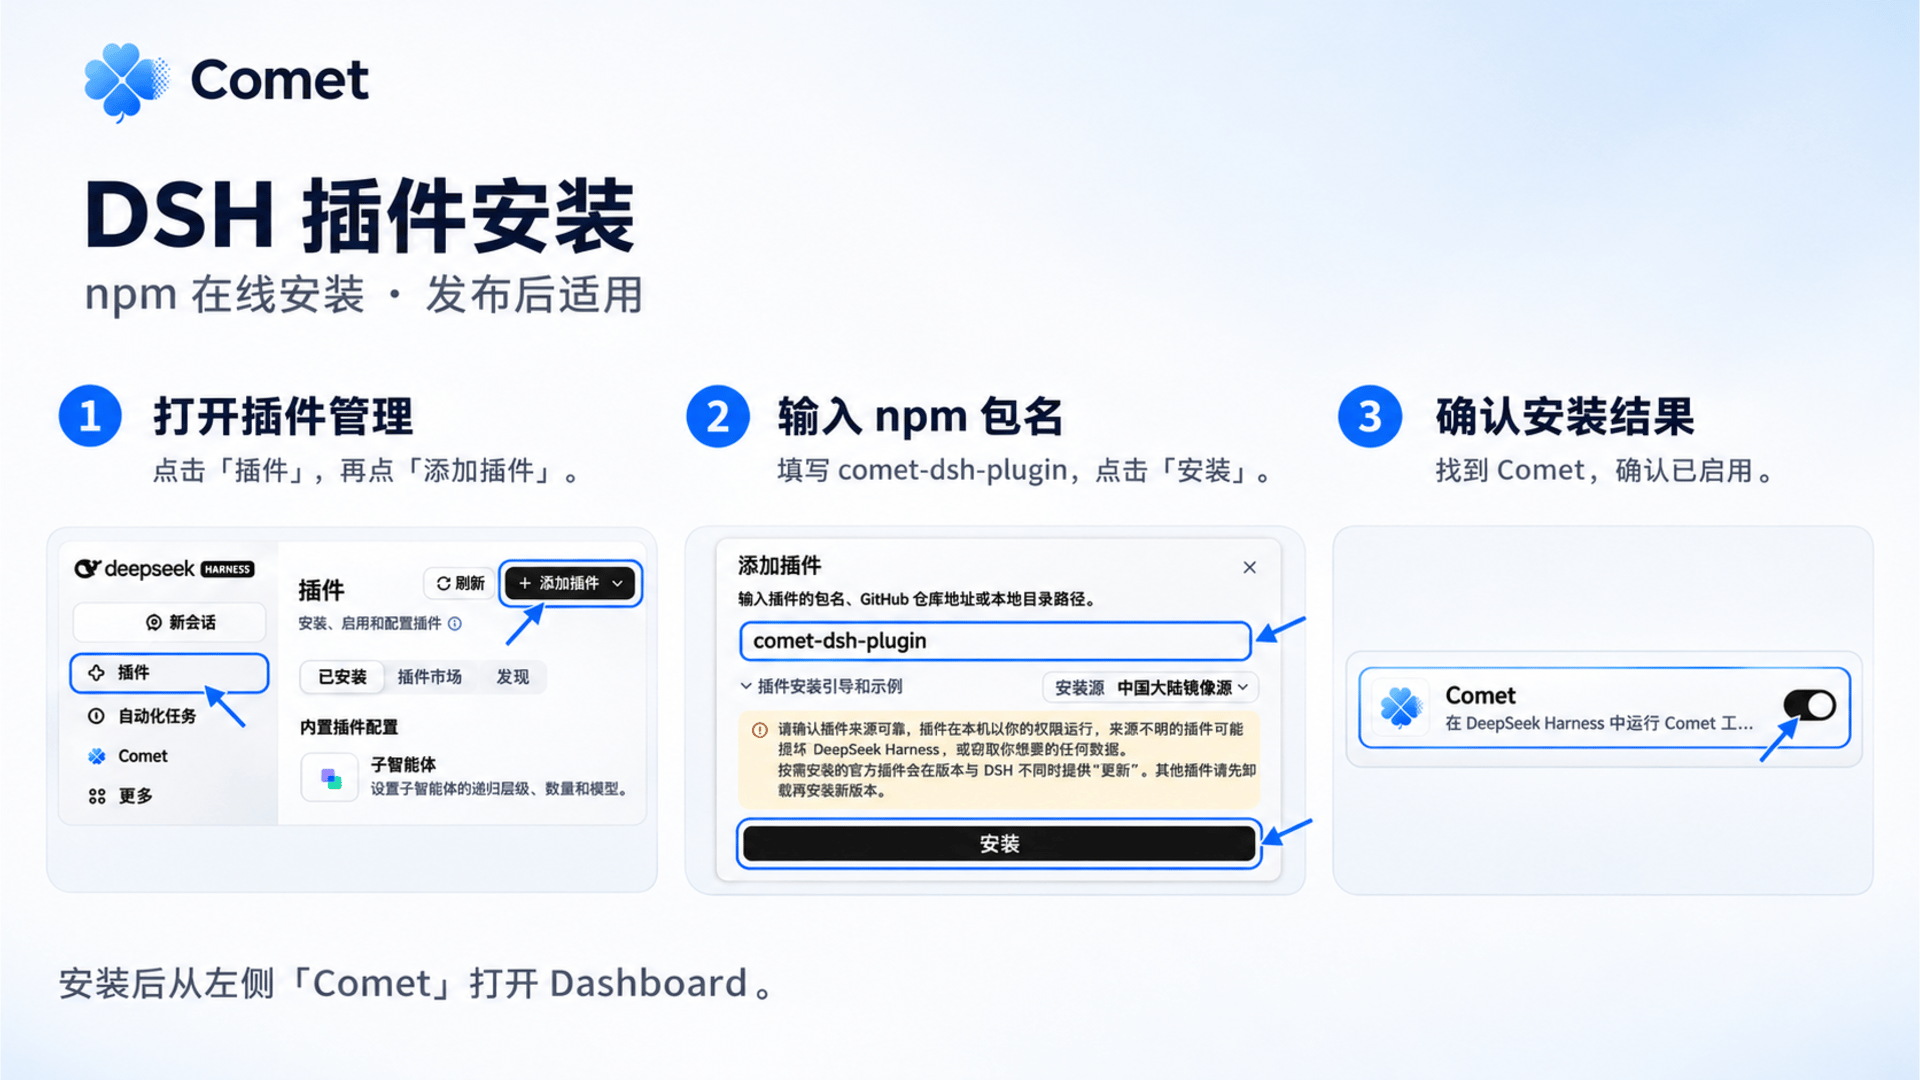
DSH plugin installation: add the package and confirm that Comet is enabled. Screenshots use the Chinese interface.
Runtime mechanics
- The plugin automatically installs a matching version of the Comet CLI along with its dependencies.
- After opening a new session or restarting DSH, both the integrated terminal and system terminals can run
cometcommands directly. - Disabling the plugin only removes desktop integration entries; it never deletes existing project rules, Spec documents, or persisted memory.
Codex plugin installation
Codex manages third-party extensions through GitHub plugin marketplaces.Installation steps
- Open the Codex desktop client and select Plugins in the sidebar.
- Select the Add menu and choose Add plugin marketplace.
- In the Source field, enter the Comet repository URL:
https://github.com/rpamis/comet, then select Add marketplace. - Locate the Comet plugin within the newly loaded marketplace, select Install, and ensure the plugin is enabled.
- In the Installed list, verify that Comet is enabled.
- Start a new chat session, enter
/hooksin the chat input to open the Hook manager, and review and trust the Comet Hook.
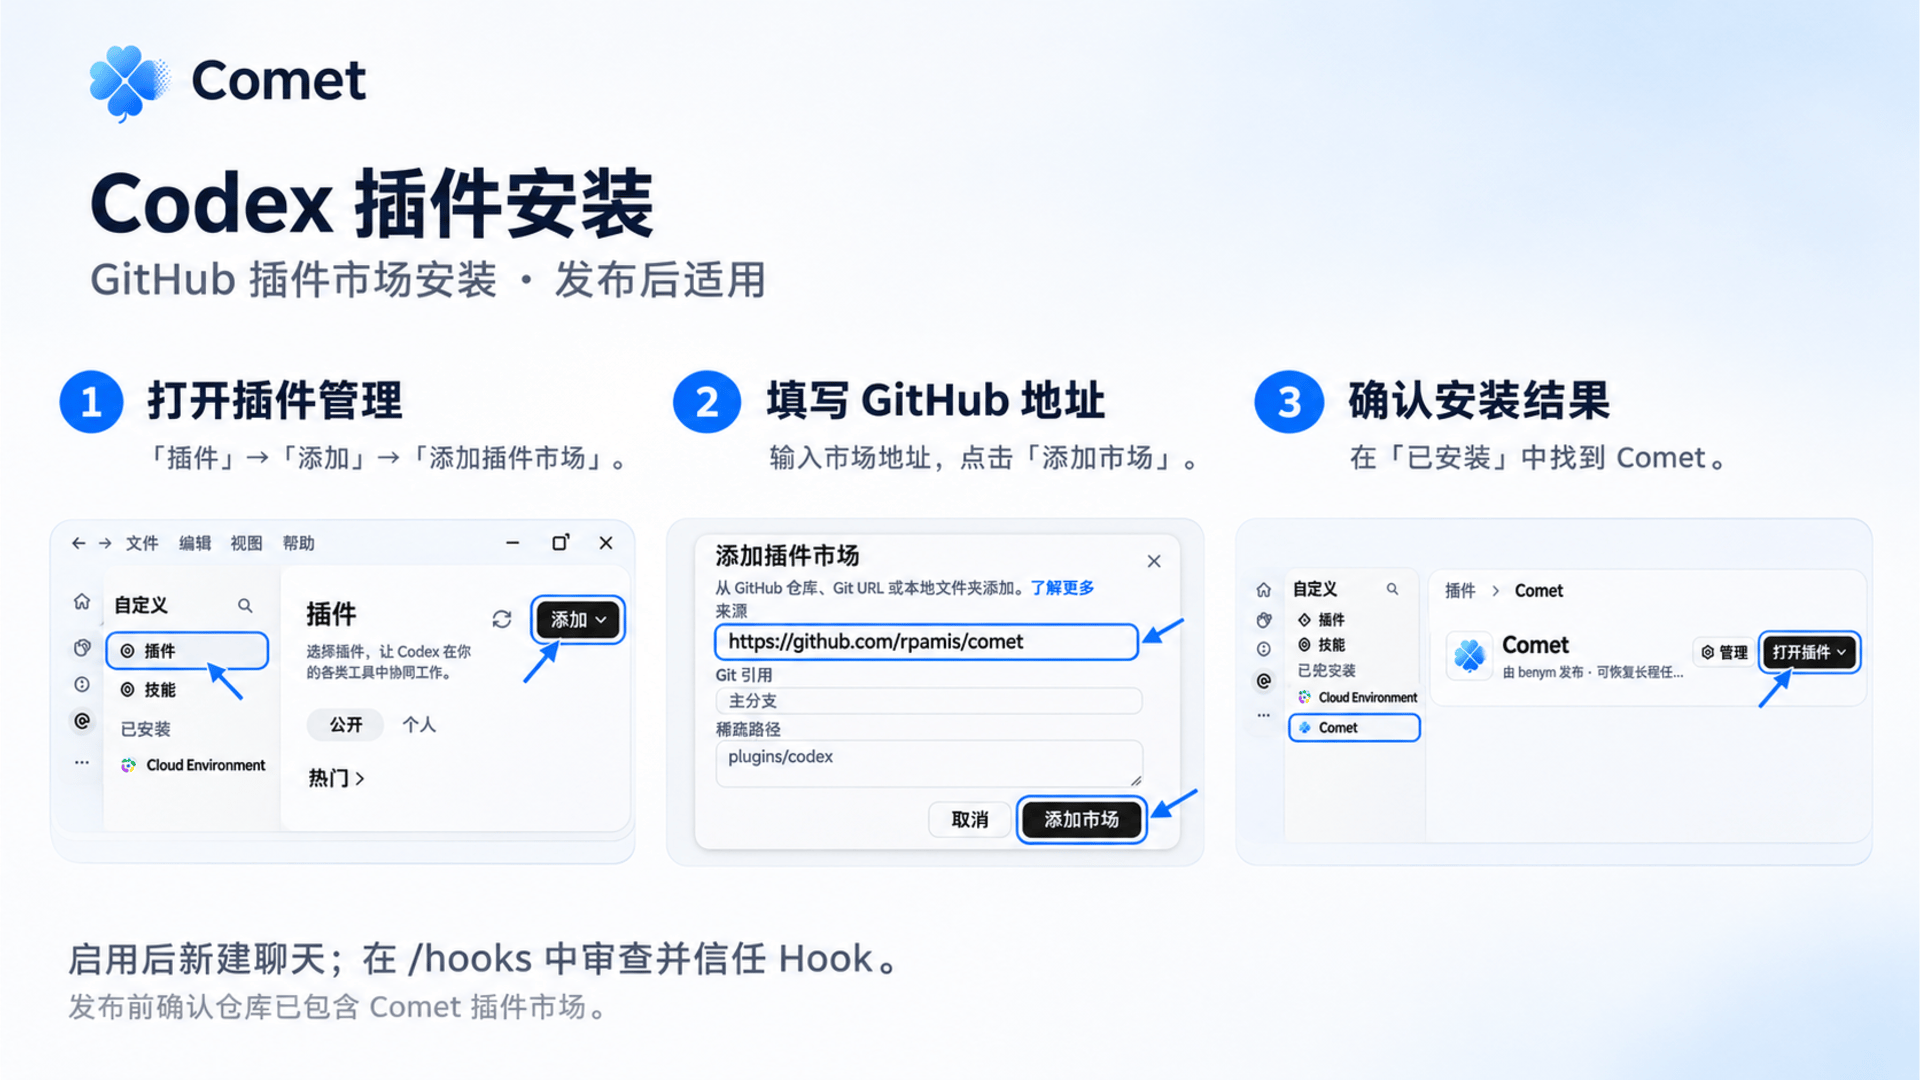
Codex plugin installation: add the GitHub marketplace and check the installed plugin. Screenshots use the Chinese interface.
Runtime mechanics and Hook trust
- When enabled, the plugin checks the local Node.js and npm environment and provisions the matching CLI tools.
- A Comet Dashboard entry appears on the left side of sessions, giving quick access to progress and intermediate artifacts.
- Hook trust: Codex strictly isolates third-party extension interception capabilities. After installing the plugin, you must manually confirm trust in
/hooks. Without trusted status, sessions will not automatically receive workflow rules and constraints.
Post-installation verification
After finishing plugin installation, verify your environment with three quick checks:- Workflow invocation: Enter
/cometin a chat session. The agent should recognize the workflow command and report the active change status. - Dashboard panel: Select the Comet icon in the sidebar to ensure the project status, task list, Personal Memory, and Project Knowledge display properly.
- Environment diagnosis: Run the health check command in your terminal:
doctor inspects Skill status, Hook configuration, working directories, and local data structures. All green indicators confirm the installation is ready.
Comparison: Plugin installation vs. global CLI
Choose the installation method suited to your development environment and workflow:Frequently asked questions
What should I do if Codex reports workflow rules are not active?
What should I do if Codex reports workflow rules are not active?
Enter
/hooks in the Codex chat window to verify that the Comet Hook is enabled and trusted. Due to sandbox security boundaries, Codex requires explicit user trust before allowing extensions to inject workflow rules.How do I install if npm or GitHub access is blocked by network restrictions?
How do I install if npm or GitHub access is blocked by network restrictions?
You can configure an npm mirror in your terminal (such as After installation, run
npm config set registry https://registry.npmmirror.com) or install the CLI globally:comet init in your project root to initialize the workflow.Will disabling or updating the plugin affect existing task progress and memory?
Will disabling or updating the plugin affect existing task progress and memory?
No. All Comet data (Spec files, change state, Personal Memory, and Project Knowledge) is persisted locally in the project’s
.comet/ folder and your user directory. Disabling or updating the plugin only modifies client UI integration and never removes persisted data.Next steps
- Dashboard overview: Explore visual tracking and operations.
- Native quickstart: Start a task-and-verification-driven workflow.
- Install and update: Review command-line installation, updates, and uninstallation.
- Personal Memory: Manage cross-session personal collaboration preferences.
- Project Knowledge: Maintain repository-level engineering practices and architecture conventions.